Public Profiles Guide
This guide covers everything you need to know about creating and managing your public profile in the Fish Application.
Overview
Public profiles allow you to create a professional, shareable page where you can publish announcements, intake updates, exam schedules, class cancellations, and other important information. This feature helps you communicate effectively with current and prospective students and their parents.
What is a Public Profile?
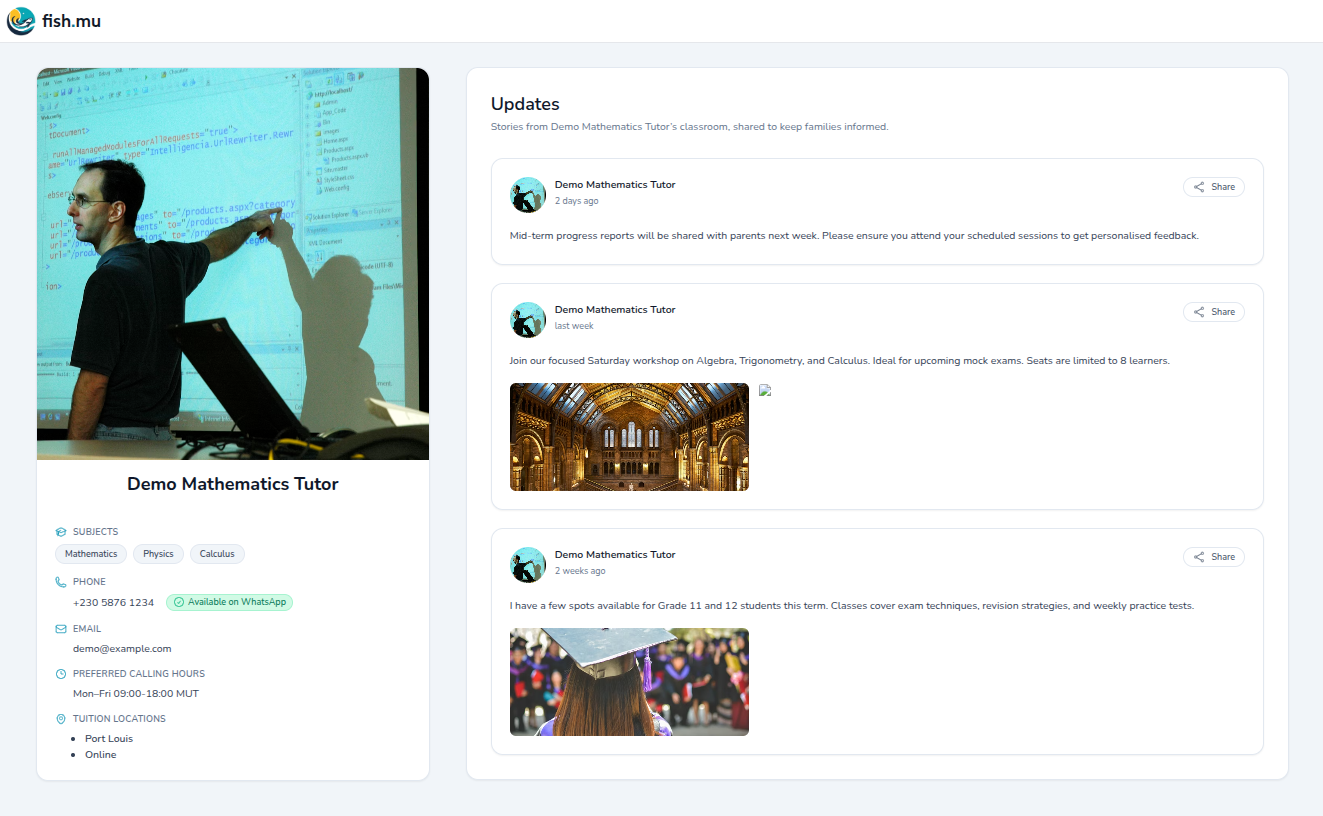
A public profile is a dedicated web page that showcases your tuition services. It’s accessible to anyone with the link, making it perfect for sharing with students, parents, and potential new students. Your public profile includes:
- Announcements: Share important updates and news
- Intake Updates: Inform about new class openings and availability
- Exam Schedules: Post exam dates and important academic information
- Class Cancellations: Notify about schedule changes
- General Information: Display your teaching services and expertise
Creating Your Public Profile
Step-by-Step Process
-
Navigate to Public Profile Settings
- Log in to your Fish account
- Go to your account settings or profile section
- Look for “Profile”
-
Set Up Your Profile
- Enable your public profile
- Customize your profile information
- Add a profile description or bio
- Upload a profile picture (optional)
-
Get Your Profile Link
- Once enabled, you’ll receive a unique public profile URL
- This link can be shared with anyone
- The link format is typically:
fish.mu/tutors/[your-unique-id]
Tip: Your public profile URL is permanent and can be bookmarked or shared on social media, business cards, or email signatures.
Sharing Posts
Creating a Post
-
Access Posts
- Go to your public profile management section
- Scroll down to the “Posts” section
-
Create New Post
- Click “New Post”
- Enter a title for your post
- Write the post content
- Add any relevant details or formatting
-
Publish
- Review your post
- Click “Publish” to make it visible on your public profile
- The post will appear on your profile page
Types of Posts
You can create various types of posts:
- General Updates: Share news about your teaching services
- Intake Information: Post new class openings or availability
- Exam Schedules: Post important exam dates and times
- Class Cancellations: Notify about schedule changes or cancellations
- Special Events: Share information about workshops, seminars, or special sessions
- Anything Else: Share anything you want with your students and parents
Note: Posts are displayed in chronological order, with the most recent appearing first on your public profile.
Best Practices
Writing Effective Posts
- Be Clear and Concise: Use simple language that everyone can understand
- Include Important Details: Always include dates, times, and any relevant information
- Use Formatting: Break up text with headings, bullet points, or paragraphs for better readability
- Update Regularly: Keep your profile active by posting regular updates
Profile Management Tips
- Keep Information Current: Regularly update your profile information and announcements
- Professional Tone: Maintain a professional yet friendly tone in all communications
- Timely Updates: Post announcements well in advance for important dates
- Regular Maintenance: Review and remove outdated announcements periodically
Important: Remember that your public profile is visible to anyone with the link. Only share information that you’re comfortable making public. Avoid sharing sensitive personal information or private student details.
Sharing Your Profile
Ways to Share
- Direct Link: Share your profile URL directly via email, messaging, or social media
- Email Signature: Add your profile link to your email signature
- Business Cards: Include your profile URL on business cards or promotional materials
- Social Media: Share your profile link on your facebook, instagram, twitter, etc.
- Website: Link to your profile from your personal website or blog
Privacy Considerations
- Your public profile is accessible to anyone with the link
- Only share information appropriate for public viewing
- Do not include sensitive student information
- Consider what information you want to make publicly available
Troubleshooting
Common Issues
Q: I can’t find the public profile option
- Ensure you’re logged into your Fish account
- Look in “Profile” section in your account
Q: My profile link isn’t working
- Verify that your public profile is enabled
- Check if the URL is correct
- Try copying the link again from your settings
Q: Posts aren’t appearing
- Make sure you’ve published the post (not just saved as draft)
- Check if your public profile is enabled
- Refresh the profile page
Q: Can I edit or delete posts?
- Yes, you can edit or delete posts from your “Posts” section
- Changes will be reflected immediately on your public profile
Support
For more help with public profiles, please contact us at support@fish.mu.